 how-to
Design a Walk-In Shower for Seniors: Step-by-Step
Table of Contents
- Assess Your Senior's Mobility Needs and Space
- Walk-In Shower Dimensions for Wheelchair Access and Movement
- Walk-In Shower Safety Features for Seniors
- Shower Grab Bar Placement for Stability and Support
- Walk-In Shower with Built-In Bench and Seating Options
- Lighting, Controls, and Accessibility Features
- Waterproofing, Drainage, and Maintenance Considerations
- Common Mistakes to Avoid When Designing Senior Showers
- Frequently Asked Questions
Last Updated: October 9, 2026
Assess Your Senior's Mobility Needs and Space
Before you start designing a walk-in shower seniors need, understand what your loved one actually needs. Not all seniors have the same mobility challenges. Some walk independently. Others use walkers or wheelchairs. Some need caregiver assistance. Your design must fit their reality.
Start by asking these questions: Can they stand for extended periods? Do they use mobility aids? Will a caregiver need to help them shower? Do they have arthritis, balance issues, or other conditions that affect movement?
Next, measure your bathroom space carefully. Walk-in shower design depends on available square footage. A tight bathroom demands a different approach than a spacious one. Measure from wall to wall. Note where plumbing currently runs. Check ceiling height.
Seniors often feel safer when they understand the space before stepping in. Walk through the bathroom with your senior. Let them show you where they struggle. Watch how they move. This isn't theoretical, it's practical intelligence that guides your whole project.
Document any existing accessibility features. Is there a grab bar already installed? Where do they hold it? What height feels natural? These observations prevent costly mistakes during renovation.
Walk-In Shower Dimensions for Wheelchair Access and Movement
The ideal walk-in shower seniors require measures at least 36 inches wide and 48 inches deep if someone uses a wheelchair. This gives enough room to maneuver and turn around safely.
For wheelchair users specifically, you need 60 inches of clear floor space to complete a 180-degree turn. That's the minimum. More space is always better. A 48-inch by 48-inch shower is comfortable. A 36-inch by 60-inch layout works if your bathroom is narrow.
The entry threshold should be no higher than half an inch. Ideally, go completely level, a curbless entry or zero-entry shower. This eliminates the tripping hazard and makes wheelchair access seamless.
Ceiling height matters too. Install the showerhead at 48 inches high for wheelchair users, 54 inches for standing seniors. This lets them adjust the angle without reaching uncomfortably. A handheld showerhead adds flexibility for different heights and mobility levels.
The entry doorway needs to be at least 32 inches wide. If you're using a swing door, confirm it doesn't block the interior space when open. A frameless sliding door or no door at all works better for accessibility.
Walk-In Shower Safety Features for Seniors
Safety is the foundation of every senior-friendly walk-in shower. Falls happen in seconds. Proper design prevents them.
Barrier-Free and Low-Threshold Entry
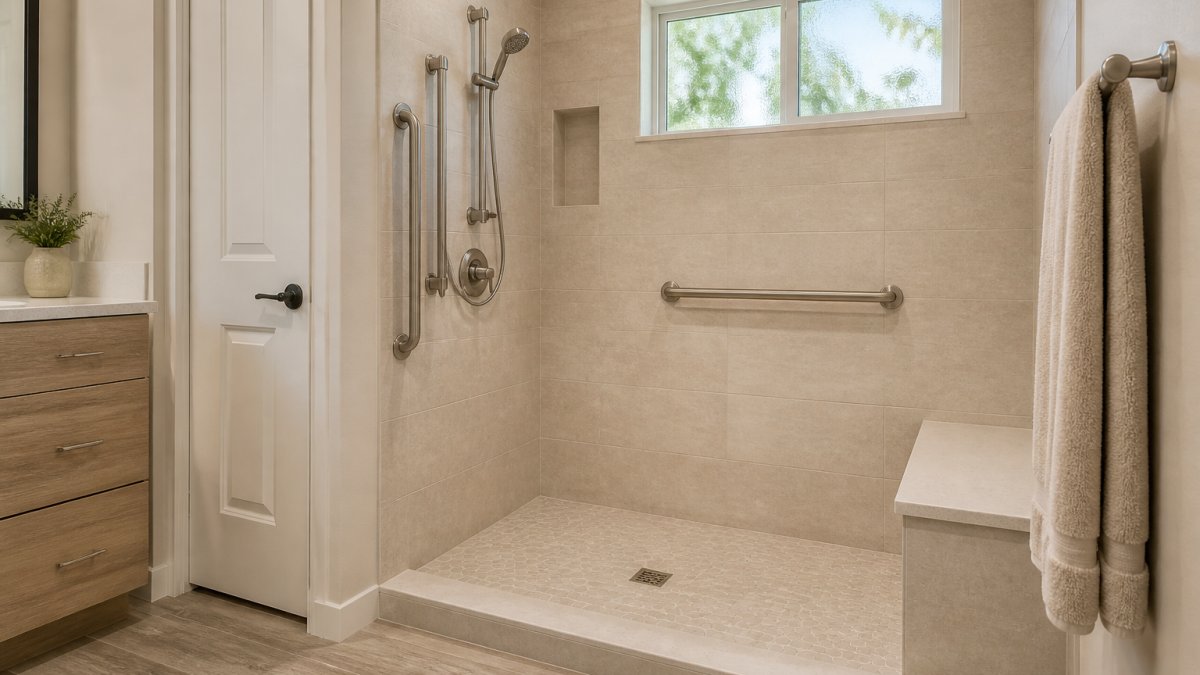
A barrier-free entry means no step up into the shower. This is non-negotiable for seniors using walkers or wheelchairs. The floor should be flush with the bathroom floor, sloping gently toward the drain.
Low-threshold entry reduces fall risk dramatically. Your senior won't catch their toe. They won't stumble. They'll step in confidently. The transition feels natural.
Install a linear drain along one edge of the shower floor. This handles water without creating a visible barrier. Slope the floor at a 2 percent grade, that's about a quarter-inch drop per foot. It's subtle but effective.
If your bathroom layout makes a completely level entry impossible, keep any threshold below half an inch. Anything higher creates a tripping hazard that defeats the purpose of accessible design.
Slip-Resistant Flooring and Non-Slip Surfaces
Wet floors are dangerous. A slip-resistant surface is essential. Choose tile with a coefficient of friction (COF) rating of at least 0.60. This means the tile grips wet feet reliably.
Textured tile, non-slip strips, or pebbled surfaces all work. Avoid polished marble or smooth ceramic, they're beautiful but treacherous when wet. Matte finishes or textured glazes provide grip without looking institutional.
Non-slip strips are an affordable backup. Apply them to the shower floor in high-traffic areas. They're visible but functional. Some seniors appreciate seeing them, it signals that safety was considered.
Grout matters too. Use epoxy grout instead of standard cement grout. It resists moisture better and stays cleaner. A clean floor is a safer floor.
Scald Prevention and Temperature Control
Hot water burns happen fast. A senior with reduced sensation might not notice water getting too hot until damage occurs. Thermostatic mixing valves solve this problem.
Install a valve that limits water temperature to 120 degrees Fahrenheit. This prevents scalding while still providing hot water for comfort. The valve adjusts automatically if someone adjusts the handle, it won't exceed the safe maximum.
A pressure-balancing valve helps too. If someone flushes a toilet while the shower is running, it prevents a sudden temperature spike. Both features are inexpensive insurance.
Mount the controls at a reachable height, between 38 and 48 inches from the floor. A single lever handle is easier to use than separate hot and cold knobs, especially for arthritic hands.
Shower Grab Bar Placement for Stability and Support
Grab bars are lifelines. They need to be in the right places, installed correctly, and sturdy enough to support full body weight.
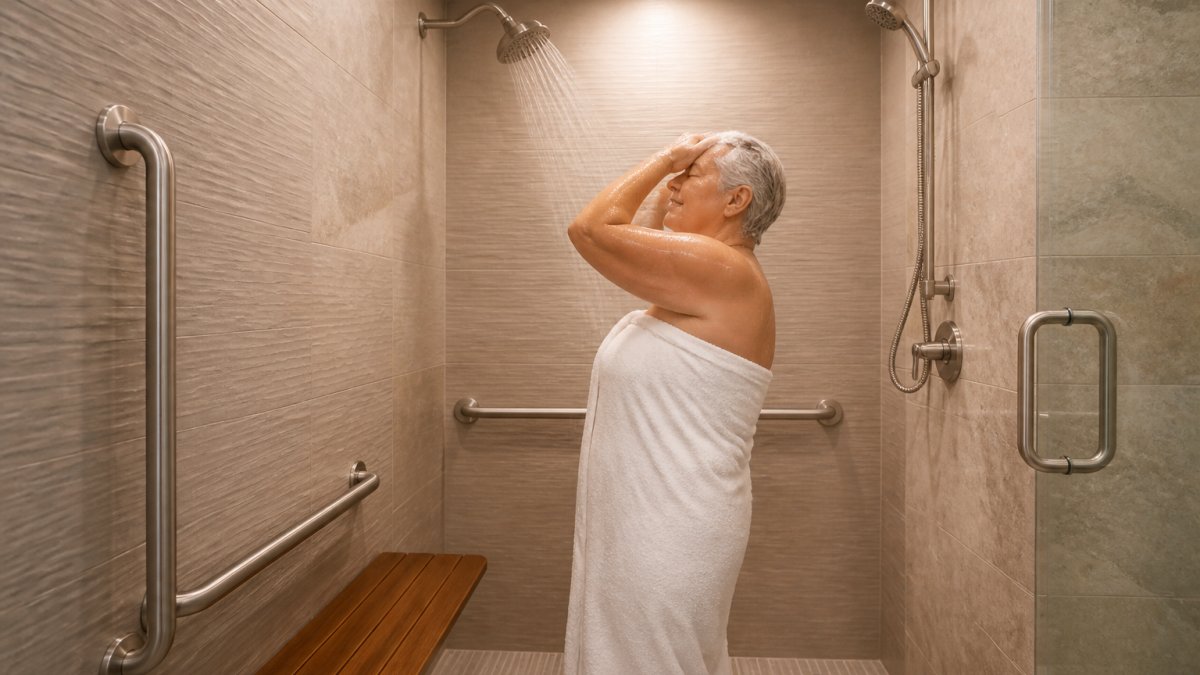
Install vertical grab bars on the entry wall, one on each side of the opening. These help your senior step in and out safely. Position them at 33 to 36 inches from the floor.
Add horizontal bars along the back wall, positioned at 33 to 36 inches high. Your senior holds these for stability while standing and washing. Space them 24 to 32 inches apart horizontally.
If your senior uses a shower bench, add grab bars flanking the bench, one on each side. This lets them sit down safely and stand back up without losing balance.
All grab bars must be anchored to studs or blocking behind the wall. Drywall alone won't hold. You need solid wood blocking at every grab bar location.
Use stainless steel or powder-coated bars rated for wet environments. They resist corrosion and provide reliable grip. Diameter should be 1.25 to 1.5 inches, comfortable for most hands.
Walk-In Shower with Built-In Bench and Seating Options
A built-in bench lets your senior sit while washing. This reduces fatigue and fall risk. They can shower safely without standing the entire time.
A built-in bench is permanent and space-efficient. Measure 18 inches high, 15 to 16 inches deep, and as wide as your shower allows. Mount it securely to the wall studs. Teak or other moisture-resistant wood works well. Tile-covered concrete is durable and easy to clean.
Fold-down benches save space in smaller bathrooms. They fold flat against the wall when not in use. Install them at the same height as a built-in bench. Make sure they're rated for your senior's weight and lock securely when deployed.
A shower chair is portable and flexible. Your senior can position it wherever they need it. Aluminum frames resist rust. Non-slip feet keep it stable on wet floors. Some have armrests for extra support.
Whichever option you choose, ensure it's rated for your senior's weight and that it won't slip on the wet floor. Test it yourself. Confidence comes from knowing it won't fail.
Lighting, Controls, and Accessibility Features
Poor lighting hides hazards. A senior with vision changes needs bright, even illumination. Install recessed LED lights in the ceiling. Aim for at least 50 foot-candles of light. Avoid harsh shadows.
Add a light switch outside the shower, within easy reach. A dimmer lets your senior adjust brightness. Some prefer softer light; others need maximum visibility.
Position controls, the valve handle and any accessories, between 38 and 48 inches from the floor. This height works for most people, whether standing or seated. A single lever handle beats separate hot and cold knobs. It's intuitive and easier to operate with limited hand strength.
Install a handheld showerhead on an adjustable rail. Your senior can lower it for seated washing or raise it for standing use. The rail should extend the full height of the shower wall.
Consider a rainfall showerhead for standing users who can manage it. Combine it with the handheld option, best of both worlds. This gives flexibility as needs change.
Waterproofing, Drainage, and Maintenance Considerations
Water damage ruins bathrooms. Proper waterproofing prevents expensive repairs down the road. Use a waterproof membrane behind all tile. Apply it to walls and floors. Seal every joint and penetration.
A linear drain is easier to maintain than a traditional center drain. Debris doesn't pool around a central point. Water flows in one direction. You can clean it quickly.
Slope the floor toward the drain, about 2 percent grade. Test it by pouring water on the floor. Watch it flow. It should move toward the drain, not pool in corners.
Grout sealing is maintenance, not optional. Seal the grout after installation and every 1-2 years thereafter. This prevents moisture from seeping behind the tile and causing mold or structural damage.
Choose materials that resist mold and mildew. Ventilation helps, install an exhaust fan that runs during showers and for 20 minutes after. A high-quality fan removes moisture before it becomes a problem.
Maintenance is easier when design is simple. Avoid intricate tile patterns or hard-to-clean corners. Smooth surfaces and generous spacing make cleaning quick and thorough.
| Design Element | Purpose | Key Specification |
|---|---|---|
| Curbless entry | Eliminates tripping hazard | Threshold below 0.5 inches |
| Grab bars | Provides stability and support | 1.25-1.5 inch diameter, anchored to studs |
| Non-slip flooring | Prevents falls on wet surfaces | COF rating of 0.60 or higher |
| Built-in bench | Allows seated washing | 18 inches high, 15-16 inches deep |
| Thermostatic valve | Prevents scalding | Maximum 120 degrees Fahrenheit |
| Linear drain | Manages water without pooling | Sloped at 2 percent grade |
| Handheld showerhead | Provides flexible water delivery | Adjustable rail, 48-54 inches high |
| Recessed LED lighting | Improves visibility and safety | At least 50 foot-candles |
Common Mistakes to Avoid When Designing Senior Showers
Mistake one: Installing grab bars in the wrong places.
Mistake two: Choosing beautiful tile over functional tile. Polished marble looks stunning but becomes treacherous when wet.
Mistake three: Making the entry too narrow. A 32-inch doorway feels tight for a walker or wheelchair user. Aim for 36 inches minimum.
Mistake four: Forgetting about water temperature. A 140-degree water heater can scald in seconds. Install a thermostatic valve. It's cheap insurance against serious injury.
Mistake five: Skipping proper waterproofing. Water finds every gap. It seeps behind tile. It rots wood. It grows mold. Invest in quality waterproofing.
Mistake six: Installing controls too high or too low. If your senior can't reach the valve handle comfortably, they'll struggle every shower.
Mistake seven: Choosing a bench that's too high or too low. An 18-inch bench height works for most people.
Mistake eight: Neglecting ventilation. A humid bathroom breeds mold and mildew. Run the exhaust fan during and after every shower.
Designing a walk-in shower for seniors requires attention to detail and genuine understanding of aging bodies.
Frequently Asked Questions
What are the key safety features a walk-in shower for seniors should have?
A senior-friendly walk-in shower should include grab bars positioned at 33-36 inches high on reinforced wall blocking, slip-resistant flooring throughout, a curbless or low-threshold entry, a built-in or fold-down bench for seated showering, a handheld showerhead with adjustable controls, and a thermostatic valve to prevent scalding. Lighting should provide high contrast and visibility, and the overall design should allow wheelchair or walker access with adequate clearance.
How wide should a walk-in shower be for someone using a wheelchair or walker?
For wheelchair access, plan a minimum of 36 inches of clear entry width and at least 48 inches of interior width to allow turning and maneuvering. A 60-inch-wide shower provides comfortable space for both the senior and a caregiver if needed. The depth should be at least 36 inches, though 42-48 inches offers more flexibility for movement and seat placement.
Where exactly should grab bars be placed in a walk-in shower?
Mount vertical grab bars on both side walls at 33-36 inches high for standing support. Install a horizontal grab bar at the entry to help with balance when stepping in. Add a second horizontal bar at 48 inches high if the shower is deeper. All bars must be anchored to reinforced wall blocking or studs.
Can I install a walk-in shower in a small bathroom?
Yes, but careful planning is essential. A compact walk-in shower can work in tight spaces by using a corner layout, a linear drain instead of a traditional slope, and a frameless or minimal-frame glass enclosure to maximize visual space. Focus on essential safety features like grab bars, slip-resistant flooring, and a low threshold. Consult with a design professional to ensure your specific bathroom layout accommodates accessibility and proper drainage.